From Portrait to Collectible
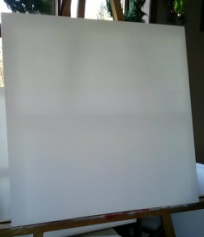
The portraits that are donated to service men and women, handlers, and adoptive owners starts here. Since The K9 Hero Portrait Project is funded solely from the sales of challenge coins, I wanted to share with you the process and why these portraits mean as much to me as they do to their recipients.
It all starts with a very blank canvas. 24 inches wide and high, and 1 1/2" deep gallery wrapped canvas. Gallery wrapped means there are no staples visible on the front or four edges. I paint the edges with the red, white and blue from the flag around the edges and to the back so that the portrait does not need framing, but the recipient can choose to do so.
It all starts with a very blank canvas. 24 inches wide and high, and 1 1/2" deep gallery wrapped canvas. Gallery wrapped means there are no staples visible on the front or four edges. I paint the edges with the red, white and blue from the flag around the edges and to the back so that the portrait does not need framing, but the recipient can choose to do so.
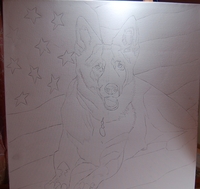
Next, a very rough "placement" sketch of the K9 Hero with the flag background is done in graphite. I use several computer screens for reference, sometimes having three open at one time, (two laptops plus a free standing monitor). This helps me see the image in three different monitor settings and comparing to real life references I have here (my horses) to try and match color tones as best as possible. (Using CWD Narnia as the reference here).
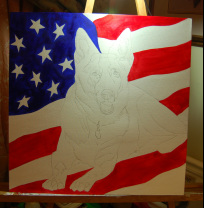
I then begin on the flag background to help balance out the composition of the K9 Hero so that I can adjust their position to best match up with the flag stripes and stars. The red, white, and blue will receive four layers of paint to really deepen the colors and give depth and texture like real fabric. (Using CWD Narnia as the reference here).
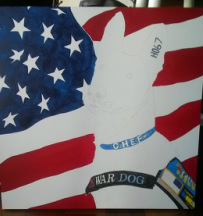
For a K9 Hero who has a vest or harness, I will begin the layout of the details of this to ensure composition and placement are "set" and I can build the K9 Hero around this. I like to have some base coloring in for these items to help balance out the white on the canvas. I don't like painting K9 Heroes and having large white void areas, it makes it difficult for me to do my dimensional painting I'm known for. (Using MWD Chef as the reference here).
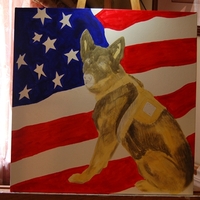
Next, I do color wash, like a watercolor, of the majority color(s) of the K9 Hero to begin building up layers. I sometimes call this my "Lion King" hyena (Ed) stage since sometimes the voids where the eyes are and the smiles of the mouths are very prominent. (Using MWD Niko as the reference here).
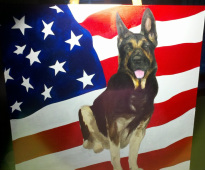
I then begin adding the "markings" layers. These are strictly the base coat colors and will have at least 20-30 layers of higher, mid, and low tones added to build up dimension and the individual hairs of the fur. (Using MWD Max as the reference here).

Usually after the second or third layer of body coat colors I will begin working on the eyes. These are "blocked" in with the primary colors and details will be added towards the end of the portrait. Sometimes I will completely redo the eyes after seeing how the body transforms with the 3D effect I paint. (Using as reference from L to R: MWD Chef, CWD Narnia, MWD Suzi).
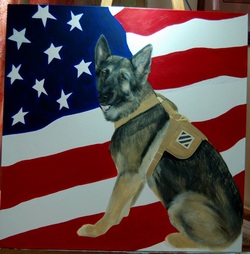
Sables are the most difficult to paint. I first build up several layers of undercoat but also keeping in mind the musculature of the particular K9 Hero. In between each layer, I varnish the portrait. This helps build dimension and allow the paints to look much richer. Here, MWD Niko's body and side are getting deep sabling built up, but it's still in the early phases of painting. His vest is worked on while sable hairs are done since this hair coloring will have deep shadows where the vest or harness will lie.
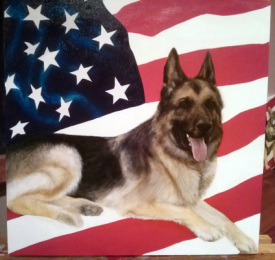
In certain cases, reference photos are not full body photos and a little ingenuity and hours of manipulation and creativity came in to play. Here, MWD Rocky's original photo was taken in a grassy area. His legs and feet were obscured by the thick grass. Since MWD Rocky was known for his huge feet, it was absolutely necessary to get those attributes included in his portrait. After working with his handler (who also adopted MWD Rocky when he retired), and many placement and removal of legs and feet, we finally came to a great final portrait that still looked balanced on the canvas.
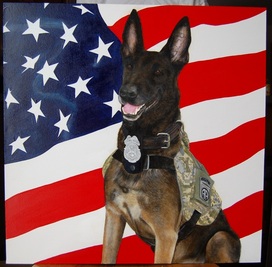
After many layers of paint and texture, depending on the length of the K9 Hero's coat, the final details are added to the accessories. In this case, MWD Ddoc has a vest, badge and collar. Once the K9 is complete, I will then do a light shimmer effect on the blue of the flag to mimic the flag fabric being wavy. Depending on the main color of the K9 Hero, I will sometimes do wave shadowing on the stripes also, but in this case with Ddoc, it would have detracted from his incredible multi-dimensional coat coloring.
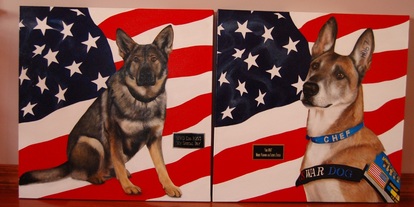
Once the shimmer is complete and approval has been made by the soldier/handler or adoptive owner, several more coats of varnish are applied and the name tag is affixed. The portrait will need to cure for at least a week in warm weather, longer during cold or damp weather. (Using as reference from L to R: MWD Edo and MWD Chef).
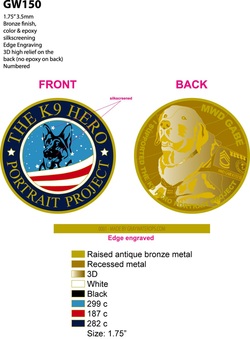
The final part of The K9 Hero Portrait Project are the collectible challenge coins. Each K9 that is completed is slated to have a challenge coin created from the portrait depiction. The challenge coins will be minted in limited quantities and numbered (laser engraved on the edge). Once the portrait has been finalized, a digital rendition and make-up is created to show the layout of the coin. This layout shows how the die will be produced in the 3D raised relief along with the lettering and K9 Hero's name. The front side of the coin is the K9HPP's logo and is epoxied with a heavy duty gloss smooth coating.
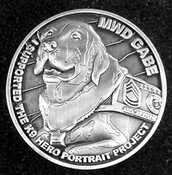
Once the die has been made, a sample coin is produced in raw metal to show the detail. After approval and up front payment, this will then be minted in batches of 100 in the metal of that particular edition, the first being antique brass.
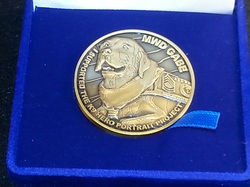
After payment is made, about three weeks later the new challenge coins arrive already packaged in their velveteen boxes, ready to be shipped to their recipients. Each coin measures 1.75" in diameter and are 3.5mm thick. These are not tin or cheap metal coins, they have really good weight to them.

I hope you enjoyed seeing the creative process and steps each portrait takes from blank canvas to challenge coins.
To order challenge coins of the K9 Hero's of the K9HPP, please visit here.
To order challenge coins of the K9 Hero's of the K9HPP, please visit here.

